Getting Started with ESP8266: Awesome Arduino Alternative
In this guide I'll show you how to get started with ESP8266 using Arduino IDE. An Arduino alternative for projects that require internet access.
What's ESP8266 ?
ESP8266 is 32-bit MCU with built-in 2.4 GHz Wi-Fi manufactured by Chinese company called Espressif Systems.
Features:
- Processor: L106 32-bit RISC microprocessor core based on the Tensilica Xtensa Diamond Standard 106Micro running at 80 MHz
-
Memory:
- 32 KiB instruction RAM
- 32 KiB instruction cache RAM
- 80 KiB user-data RAM
- 16 KiB ETS system-data RAM
- External QSPI flash: up to 16 MiB is supported (512 KiB to 4 MiB typically included)
- IEEE 802.11 b/g/n Wi-Fi
- 16 GPIO pins
- SPI
- I²C (software implementation)
- I²S interfaces with DMA (shariUART on dedicated pins, plus a transmit-only
- UART can be enabled on GPIO2ng pins with GPIO)
- 10-bit ADC (successive approximation ADC)
Source Wikipedia.
Since ESP8266 by itself is only a SoC, various breakout boards were developed by third-party manufacturers to facilitate experimentation and prototyping. Probably the most popular and widely used - NodeMCU
NodeMCU
NodeMCU is an open source IoT platform. It includes firmware and hardware which is based on the ESP-12 module. The firmware by default uses Lua scripting language, but as I mentioned in the beginning, we're going to use Arduino IDE and C++ to program it.
Now since it is an open source platform, you can find a few versions of NodeMCU. Usually, the only difference is the USB interface. The original uses CP2102 USB to serial bridge and cheaper clones usually have CH340, but both boards work exactly the same.
For this tutorial I'll be using ESP8266 NodeMCU with CH340 USB to serial bridge and Windows machine as a host. You can get it here:
- NodeMcu V3 ESP8266 ~ 2.5$
Preparing the host machine
Alright so first of all, we have to install the drivers. You can find them here: CH340 Driver for Windows or CP2102 Driver for Windows.
If you're on Mac OS or Linux you can find proper drivers here: CH340 or CP2102.
Now that we have our drivers installed, we can connect our ESP8266 with Micro USB cable to the PC. Make sure you're using USB data cable and not the simple USB power cable.
The USB connection with the PC is necessary to program the ESP8266 and not just to power it up.
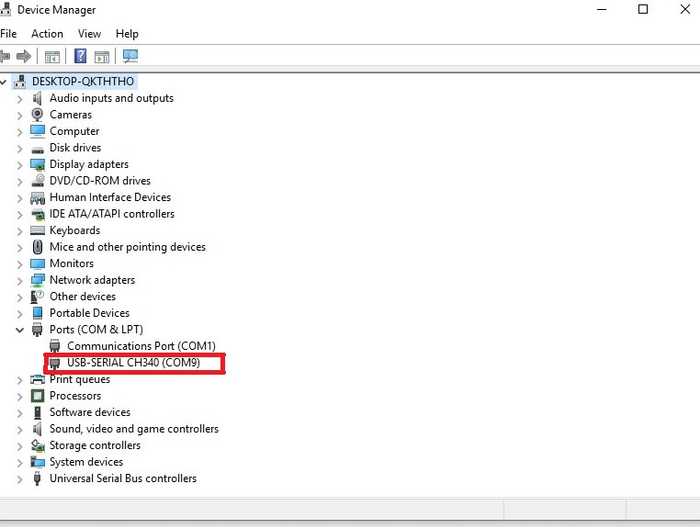
Now you should see your ESP8266 on Device Manager:
If your ESP8266 is not detected, try different USB cable. Chances are that you're actually using the USB power cable. COM port might be different in your case. As you see mine is on COM9
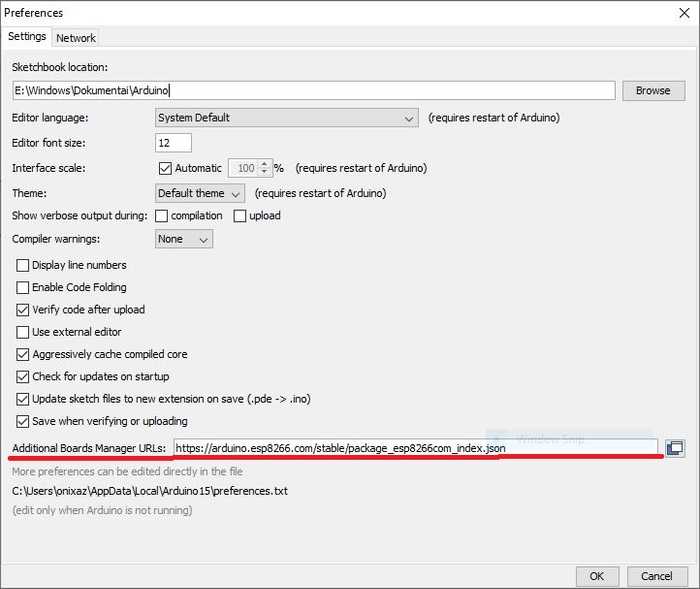
Next, open your Arduino IDE and go to File > Preferences
Look for Additional Boards Manager URLs field and paste this in
https://arduino.esp8266.com/stable/package_esp8266com_index.jsonClick OK.
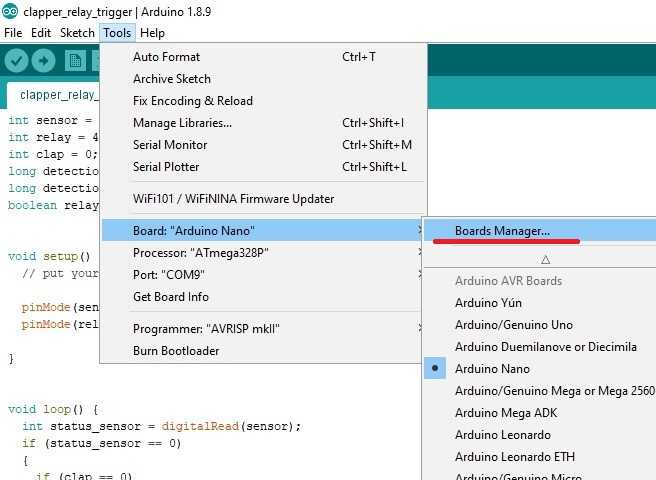
Next go to Tools > Board: "Random board" > Board Manager...
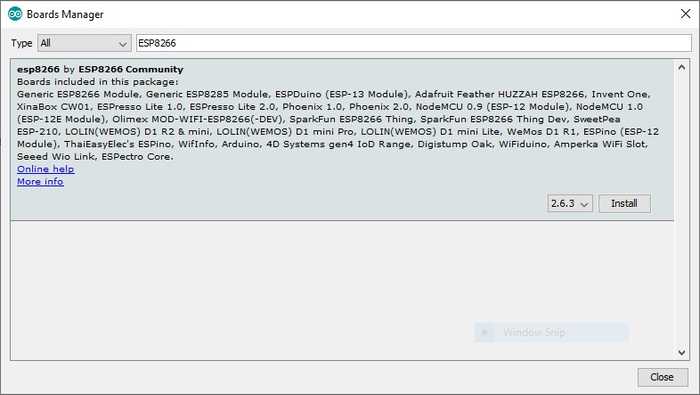
Search for ESP8266.
And click Install.
Time to test the ESP8266
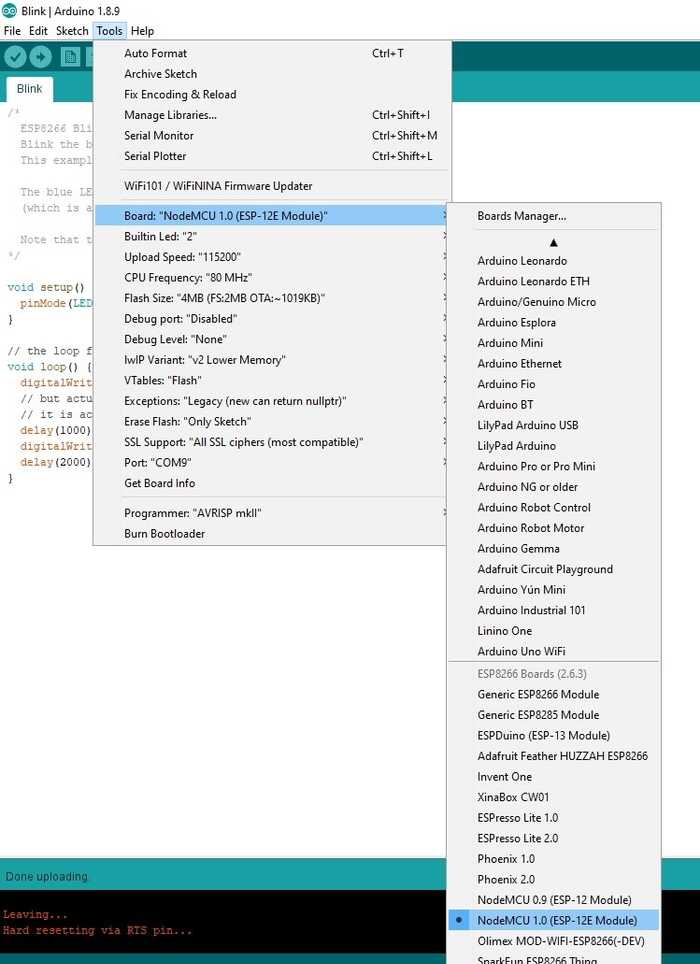
Now click on Tools again and select NodeMCU 1.0 (ESP-12E Module) as your board. Make sure the port is correct.
Go to File > Examples > ESP8266 and choose Blink example. Upload the code and your ESP8266's built-in LED should start blinking.
What's next ?
Make something great out of it!
On a more serious note, read the docs on https://arduino-esp8266.readthedocs.io/en/latest/ and start tinkering.
For now, thanks for reading !
